Chapter 2 Getting Started
shinyapps.io is a platform as a service (PaaS) for hosting Shiny web applications (apps). This guide will describe how to create a shinyapps.io account and deploy your first application to the cloud. We support both Shiny for R and Shiny for Python applications using (respectively):
- The
rsconnectR package from CRAN, or the latest version from GitHub - The
rsconnect-pythonpython package from PyPi, or the latest version from GitHub
2.1 Working with Shiny for R
Before you get started with shinyapps.io, you will need:
- An R development environment, such as the RStudio IDE
- The
rsconnectR package from CRAN, or the latest version from GitHub
To install rsconnect on your local R process, you can run the following command:
install.packages('rsconnect')After the installation completes, you can load the library in your session with the following command:
library(rsconnect)If you would like to use the latest version of the rsconnect package, you can install it with the following commands:
if(!require("devtools"))
  install.packages("devtools")
devtools::install_github("rstudio/rsconnect")
2.1.1 Creating a shinyapps.io account
Go to shinyapps.io and click “Log In”. The site will give you several options for signing in. If you have a Google account or a GitHub account, you can use either one of those methods to authenticate. Alternatively you can create a username/password combination.
The first time you sign in, shinyapps.io prompts you to set up your account. shinyapps.io uses the account name as the domain name for all of your apps. Account names must be between four and 63 characters and can only contain letters, numbers, and dashes (-). Account names may not begin with a number or a dash, and they cannot end with a dash (see RFC 952). Some account names may be reserved.
2.1.2 Deploying applications
2.1.2.1 Configure rsconnect
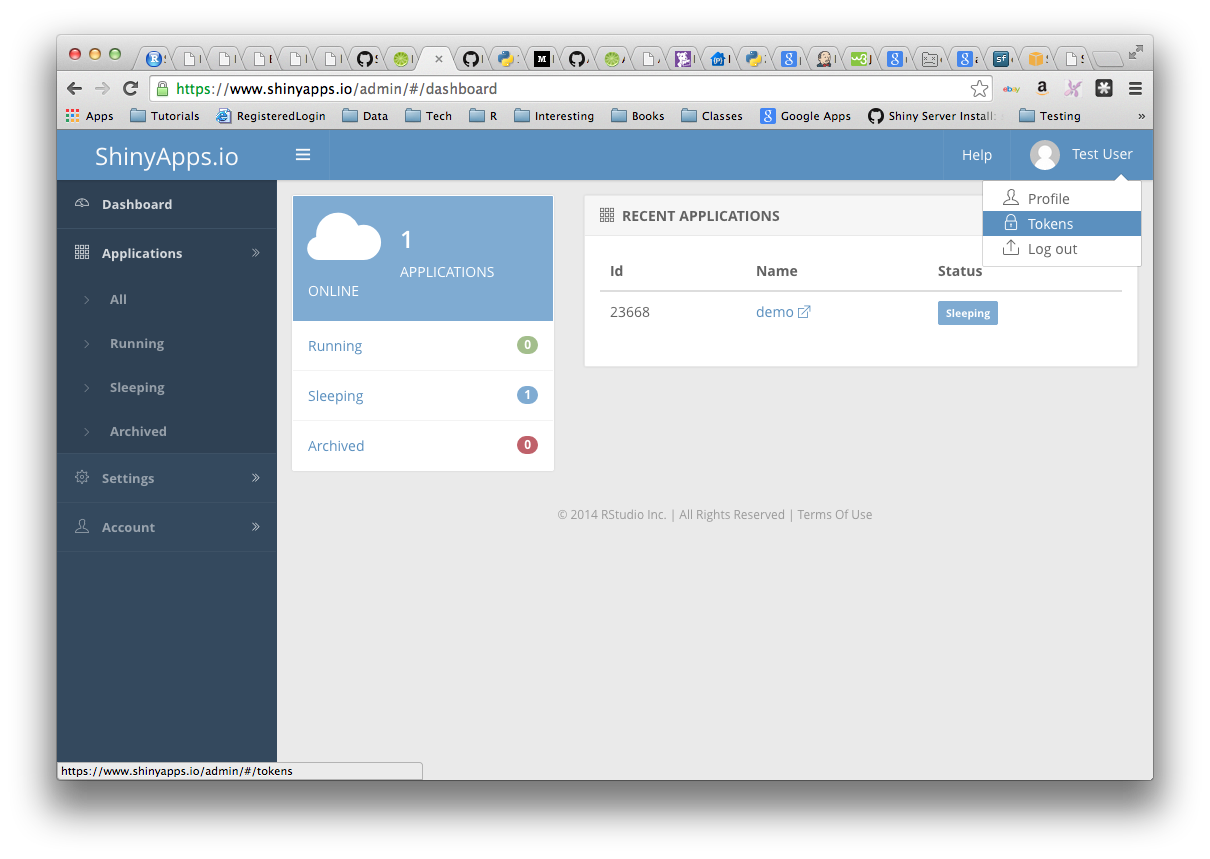
Once you have set up your account in shinyapps.io, you can configure the rsconnect package to use that account. shinyapps.io automatically generates a token and secret for you, which the rsconnect package can use to access your account. Retrieve your token from the shinyapps.io dashboard by selecting the Tokens option in the menu at the top right of the shinyapps dashboard (under your avatar).
There are two ways to configure the rsconnect package to connect to your application.
Method 1
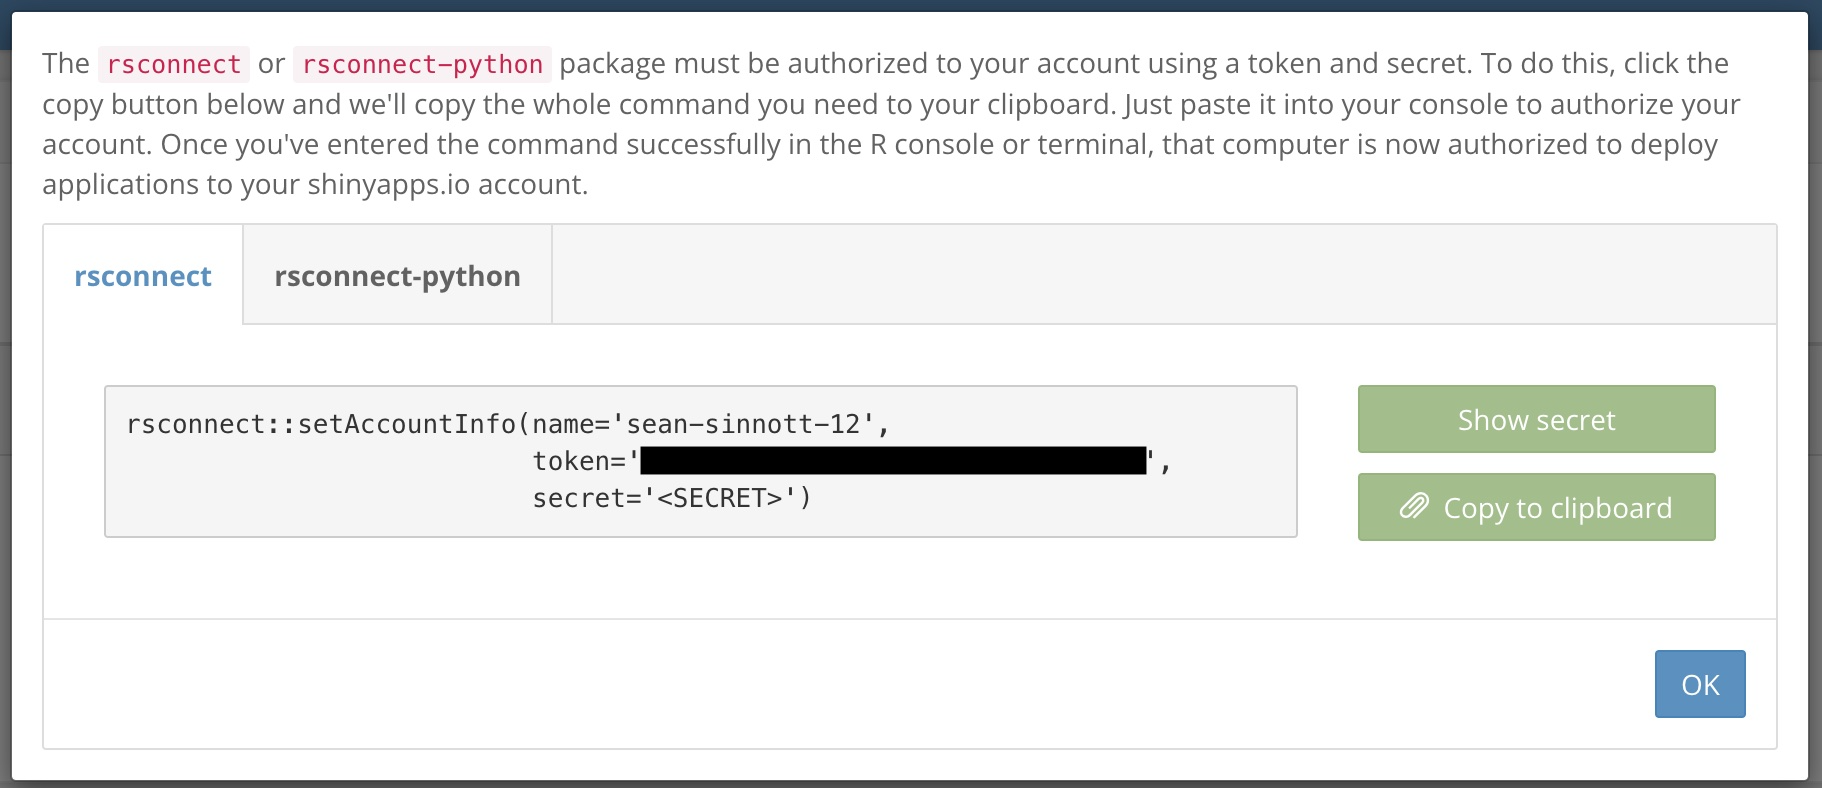
Click the Show button on the Token page. A window will pop up that shows the full command to configure your account using the appropriate parameters for the rsconnect::setAccountInfo function. Copy this command to your clipboard, and then paste it into the R console in the RStudio IDE and hit Enter.
Method 2
In the R console, run the setAccountInfo function from the rsconnect package, passing in the token and secret from the Profile -> Tokens page.
rsconnect::setAccountInfo(name="<ACCOUNT>", token="<TOKEN>", secret="<SECRET>")Once you have configured your rsconnect installation, you can use it to upload applications to shinyapps.io. If you are using the RStudio IDE, you can manage your shinyapps.io account by going to Tools -> Global Options -> Publishing.
In the second part of this guide, we will build a demo application, upload it to shinyapps.io, and create a password for the application.
2.1.2.2 Deploying a sample application
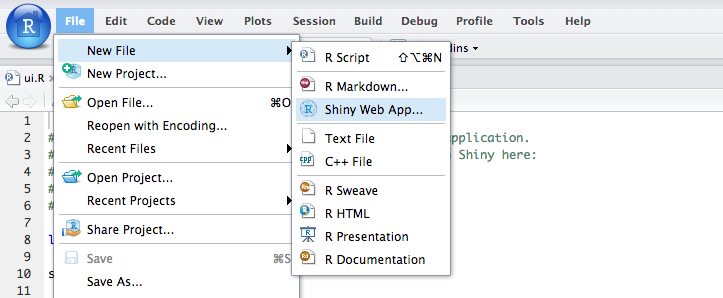
If you are using the RStudio IDE, you can create a quick sample Shiny application by clicking on the File -> New File -> Shiny Web App.
or you can copy the code below into your ui.R file
## ui.R

library(shiny)

shinyUI(fluidPage(

  # Application title
  titlePanel("Old Faithful Geyser Data"),

  # Sidebar with a slider input for number of bins
  sidebarLayout(
    sidebarPanel(
      sliderInput("bins",
                  "Number of bins:",
                  min = 1,
                  max = 50,
                  value = 30)
    ),

    # Show a plot of the generated distribution
    mainPanel(
      plotOutput("distPlot")
    )
  )
))
and server.R file
## server.R
library(shiny)
shinyServer(function(input, output) {
output$distPlot <- renderPlot({
# generate bins based on input$bins from ui.R
x <- faithful[, 2]
bins <- seq(min(x), max(x), length.out = input$bins + 1)
# draw the histogram with the specified number of bins
hist(x, breaks = bins, col = 'darkgray', border = 'white')
})
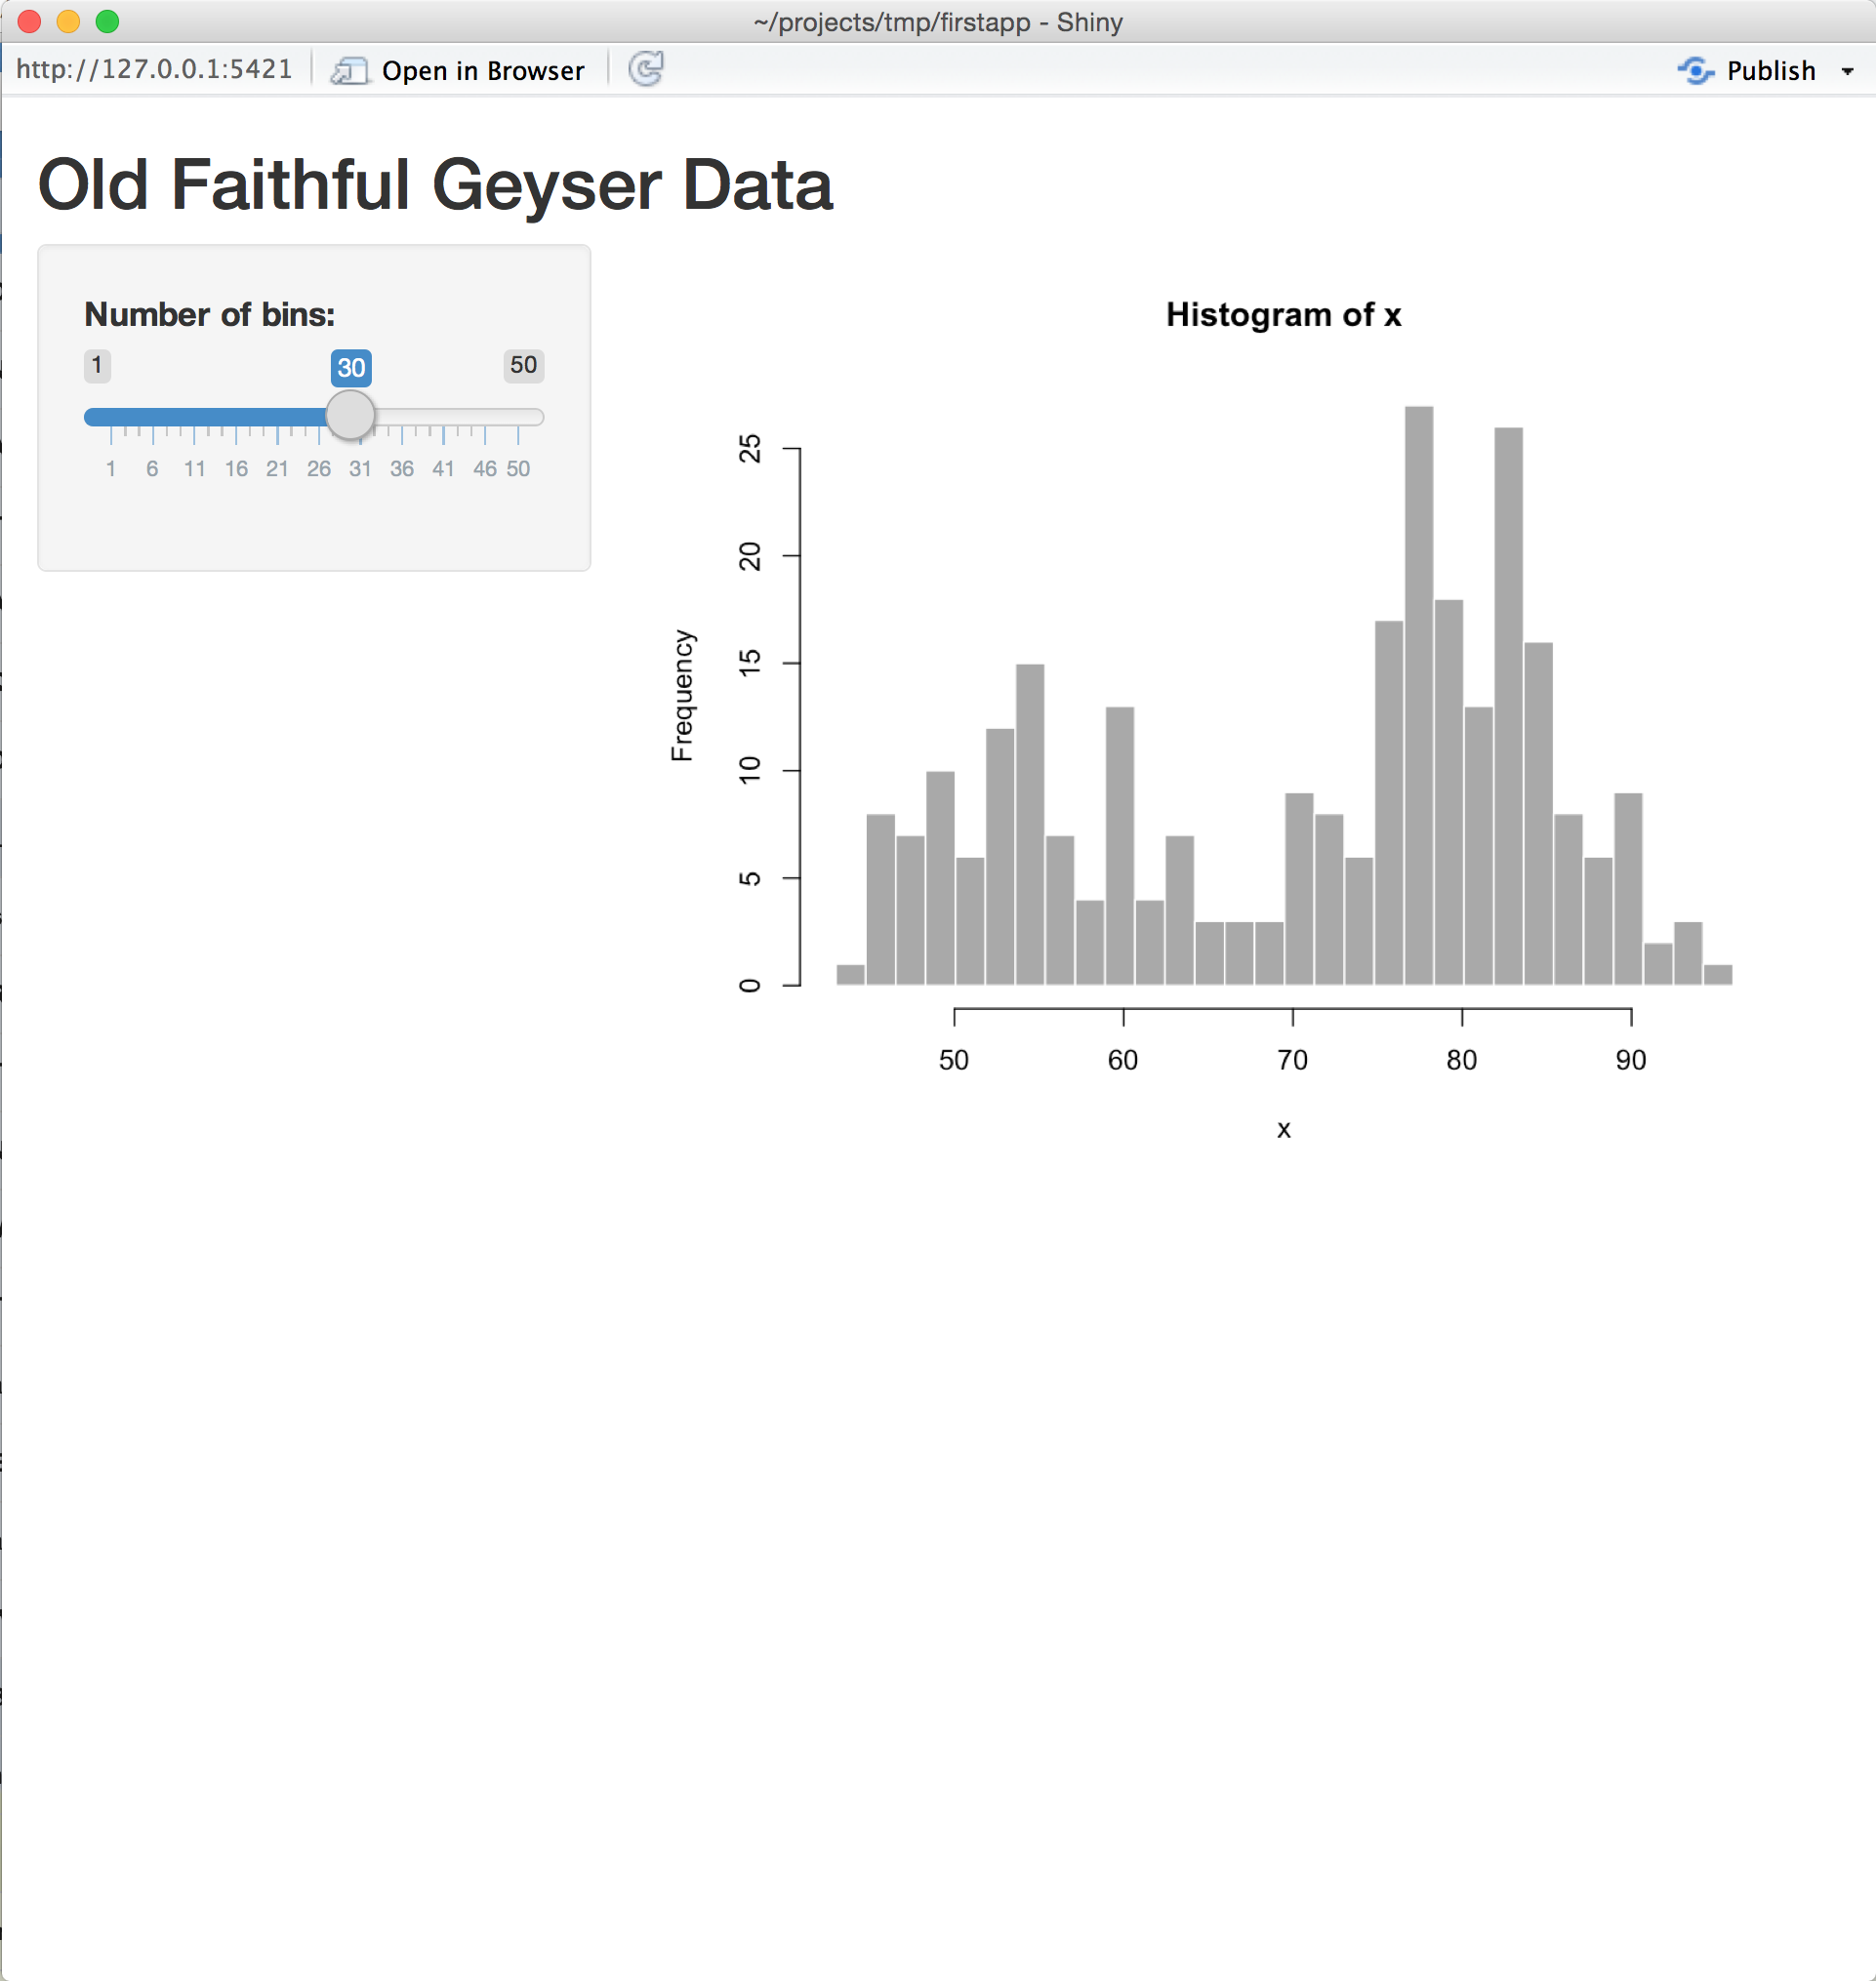
})Verify that your application works by running it locally. Set your working directory to your app directory, and then run:
shiny::runApp()If you’re using the RStudio IDE, you can also run your application by clicking the Run App button in the editor toolbar.

2.1.2.2.1 Deploying your first application
To deploy your application, you can either deploy the app from the IDE itself by clicking on the Publish button in the top right corner of the interface:
or you can use the deployApp command from the rsconnect package.
library(rsconnect)
deployApp()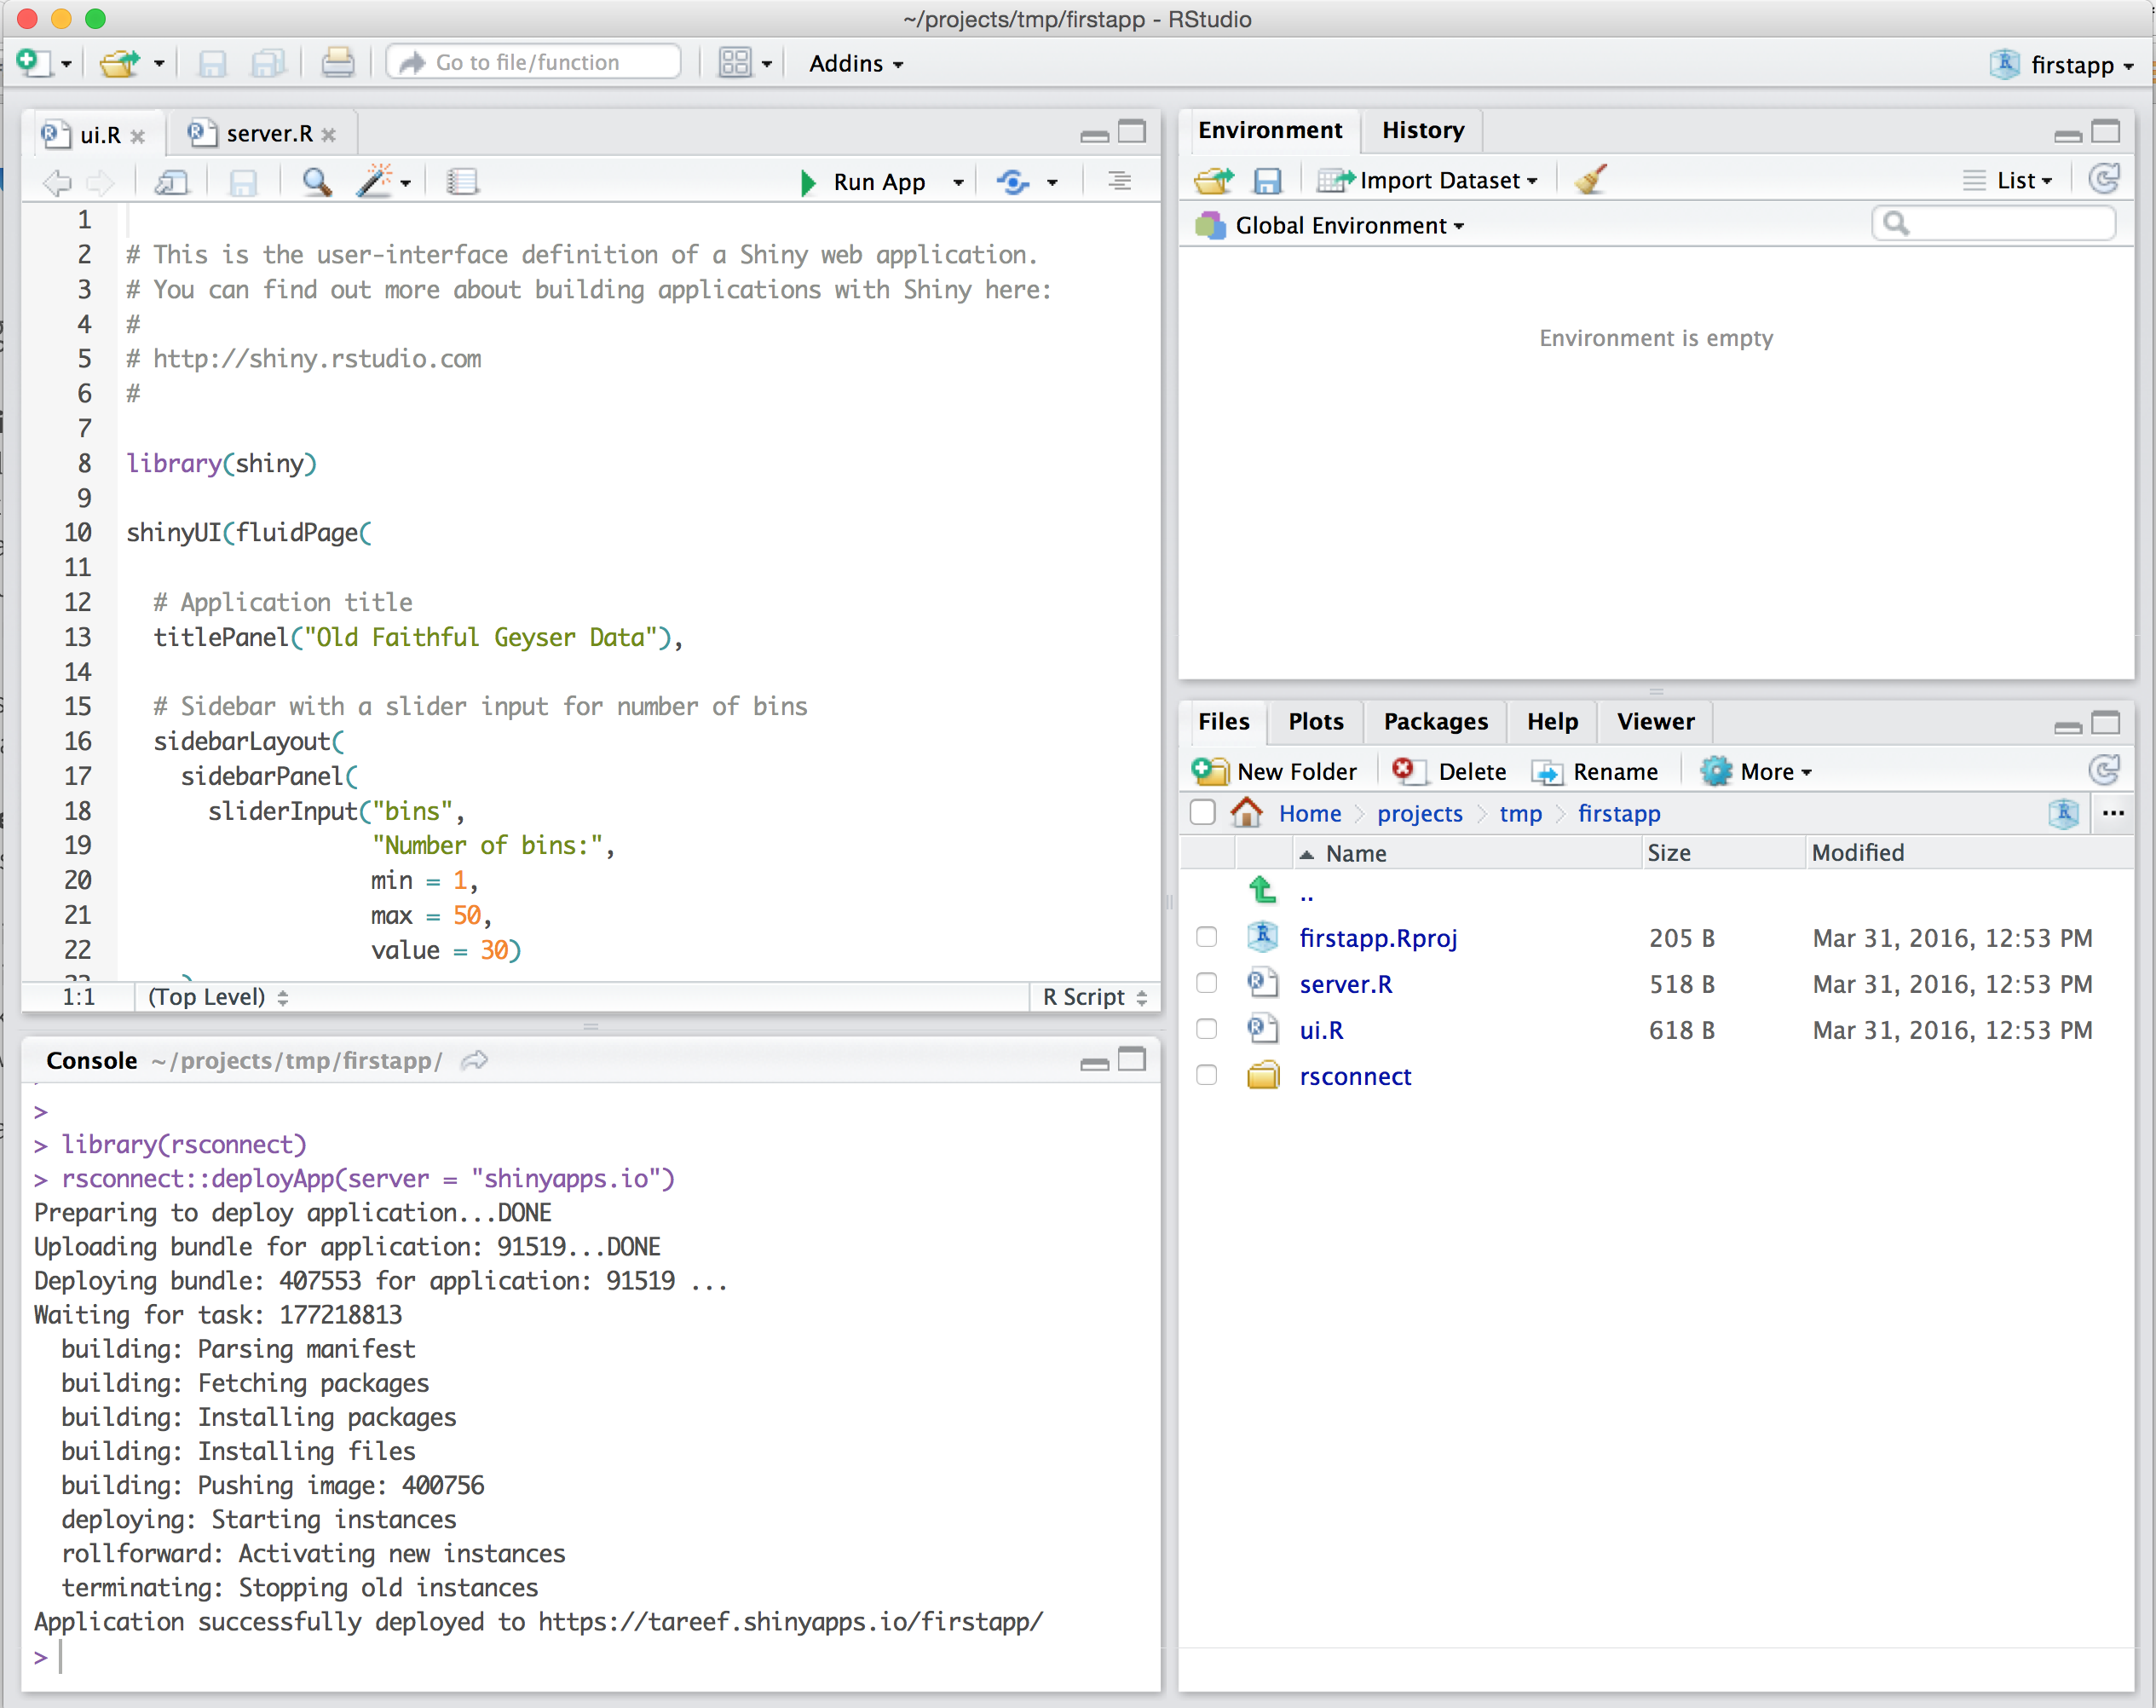
Once the deployment finishes, your browser should open automatically to your newly deployed application.
Congratulations, you have deployed your first application!
Feel free to make changes to your code and run deployApp() again. rsconnect can deploy an app much more quickly after the first deployment.
2.1.3 Using your R packages in the cloud
In order to run your applications on shinyapps.io, the service needs to replicate the environment from your local machine. shinyapps.io is built using Ubuntu Linux as the base operating system, and is likely to be different from most users’ systems.
The shiny package supports the use of any package in R that you can install. Although shinyapps.io supports the vast majority of packages in the R ecosystem, there are two important exceptions:
- R packages that do not run on Ubuntu Linux
- R packages that require access to the display (such as Tcl/Tk)
When you deploy your application, the rsconnect package detects the packages that your application uses by looking for explicit library() calls within your application. Be aware that you should not have an explicit install.packages() call within your ui.R or server.R files.
During deployment, the rsconnect package sends the R version, the list of packages and their dependencies, and your application to shinyapps.io. shinyapps.io then builds and installs the packages into the R library for your application. The first time you deploy your application, it may take some time to build these packages (depending on how many packages are used). However, you will not have to wait for these packages to build during future deployments (unless you upgrade or downgrade a package, or you upgrade to a newer version of R).
Package sources
Currently, the shinyapps.io service supports deploying packages installed from CRAN, GitHub (both public and private repos), and BioConductor.
In order for BioConductor packages to install succesfully on shinyapps.io, the repos option must be configured, either directly or by using setRepositories(), to include the BioConductor repositories in addition to CRAN. Failure to do so will result in an error on deployment of the form:
Error parsing manifest: Unable to determine package source for Bioconductor package BiocGenerics: Repository must be specified
Support for R-Forge and other repos is on our backlog; please drop us a line in the shinyapps.io Community if the lack of support is a blocker for you.
2.1.3.0.1 Important note on GitHub packages
Only packages installed from GitHub with devtools::install_github, in version 1.4 (or later) of devtools, are supported. Packages installed with an earlier version of devtools must be reinstalled with the later version before you can deploy your application. If you get an error such as “PackageSourceError” when you attempt to deploy, check that you have installed all the packages from Github with devtools 1.4 or later.
2.1.3.1 Managing R versions
There are typically three releases of R per year. In order to support the new version of R, shinyapps.io needs to compile R for each version. Typically, new versions of R are supported within three days of release.
2.1.3.2 System packages
R packages will often rely on operating system packages to be installed on the server. If your application happens to use an R package that requires a system library that is not installed by default, please let us know by filing an issue, or a pull request, at shinyapps-package-dependencies
2.2 Working with Shiny for Python
Before you get started with shinyapps.io, you will need:
- A Python development environment, like VS Code
- The
rsconnect-pythonPython package from PyPI, or the latest version from GitHub
To install rsconnect-python in your local Python environment process, you can run the following command on the terminal:
pip install rsconnect-pythonIf you would like the use the latest version of rsconnect-python, you can install with the following command in your terminal:
pip install git+https://github.com/rstudio/rsconnect-python.git2.2.1 Creating a shinyapps.io account
Go to shinyapps.io and click “Log In”. The site will give you several options for signing in. If you have a Google account or a GitHub account, you can use either one of those methods to authenticate. Alternatively you can create a username/password combination.
The first time you sign in, shinyapps.io prompts you to set up your account. shinyapps.io uses the account name as the domain name for all of your apps. Account names must be between four and 63 characters and can only contain letters, numbers, and dashes (-). Account names may not begin with a number or a dash, and they cannot end with a dash (see RFC 952). Some account names may be reserved.
2.2.2 Deploying applications
2.2.2.1 Configure rsconnect-python
Once you have set up your account in shinyapps.io and installed rsconnect-python locally, you can configure the rsconnect-python package to use that account. shinyapps.io automatically generates a token and secret for you, which the rsconnect-python package can use to access your account. Retrieve your token from the shinyapps.io dashboard by selecting the Tokens option in the menu at the top right of the shinyapps dashboard (under your avatar).
There are two ways to configure the rsconnect-python package to connect to your application.
Method 1
Click the Show button on the Token page. A window will pop up that shows the full command to configure your account using the appropriate parameters for the rsconnect add command. Copy this command to your clipboard, and then paste it into your terminal and run it.
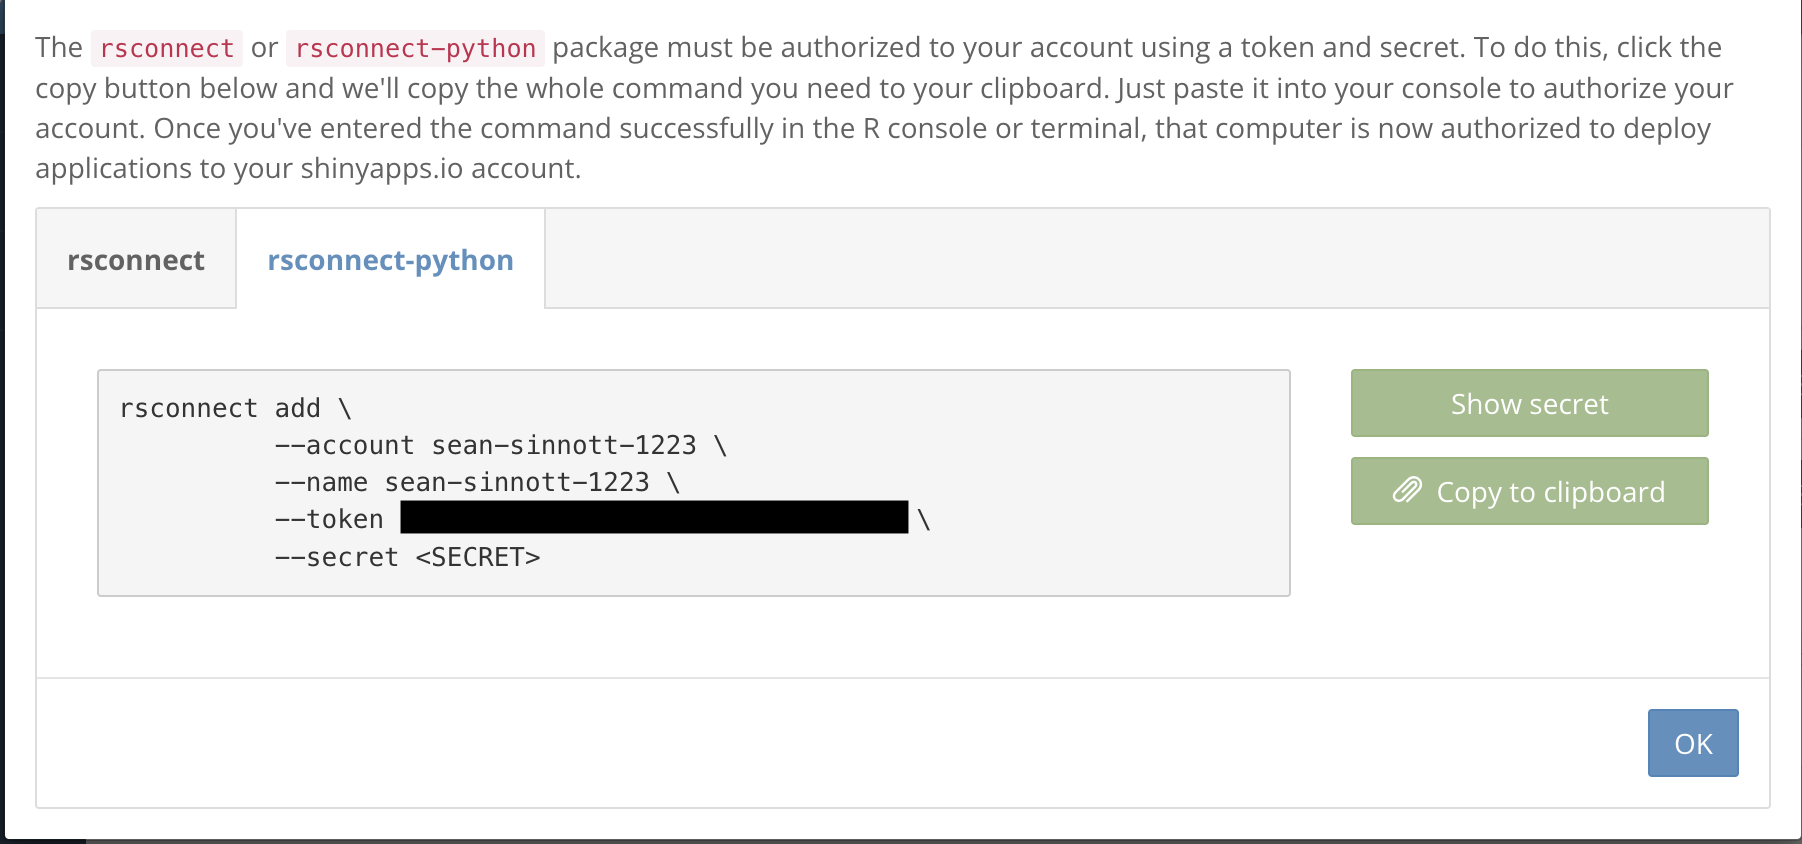
Method 2
In a terminal run the following command to configure the rsconnect-python package to use your account, passing in the token and secret from the Profile -> Tokens page.
rsconnect add --account <ACCOUNT> --name <NAME> --token <TOKEN> --secret <SECRET>Once you have configured your rsconnect-python installation, you can use it to upload applications to shinyapps.io.
2.2.2.2 Developing an Shiny app
Visit https://shiny.posit.co/py/ for in-depth information about how to develop a shiny application using python.
Once you have created your application it can be deployed to shinyapps.io by using the rsconnect-python package using the following command in your terminal,
rsconnect deploy shiny /path/to/app --name <NAME> --title my-app2.2.2.3 Managing Python versions
At this time, shinyapps.io only supports python 3.7.13, 3.8.13, 3.9.13. If an application is deployed using another version of python, shinyapps.io will attempt to run it on the closest major/minor version of python. If you’re experiencing issues with your applications and you are using another version of python, try switching to a supported version of python to debug the problem.