Curating Content
As the number of content items on your server grows, it naturally becomes more difficult to direct viewers to the subset of content that they need to see at any given time. This chapter contains strategies for creating and distributing curated views of content hosted on Posit Connect.
Use these tools to create R Markdown content or Shiny applications that presents:
- A summary or reference page to explain the parts of a complex project.
- A content hub or knowledge repository for work belonging to a specific team or objective.
- A branded entrypoint for content relevant to a stakeholder group.
Curation tools: connectwidgets
connectwidgets is a Posit-maintained R package that can be used to query a Connect server for a subset of your existing content items, then organize them within htmlwidget components in R Markdown document or Shiny application.
The package provides organization components for card, grid, and table views. Search and filter components can be applied to grids and tables.
Component examples
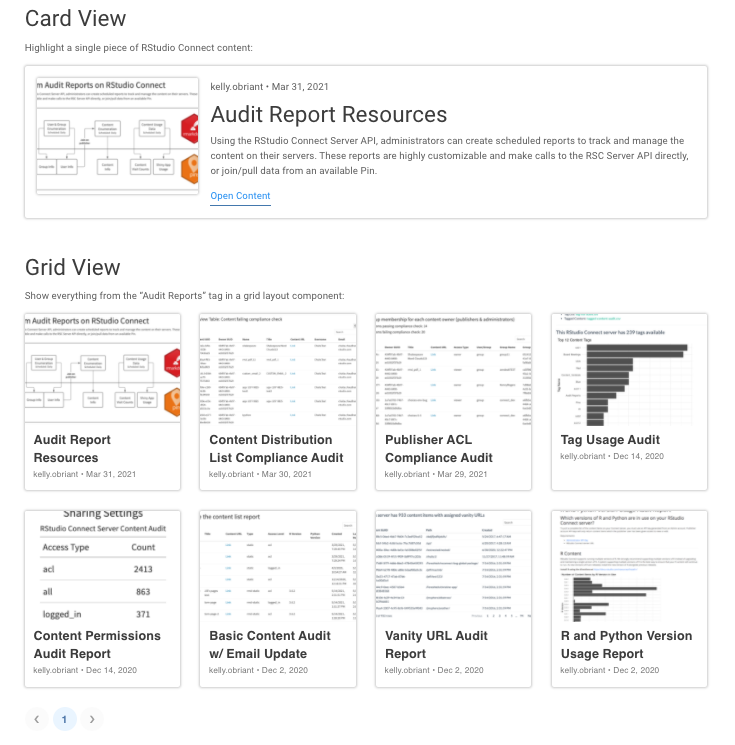
Card and grid components display metadata about each piece of content. The title, description, and preview image can be set from the Connect dashboard. Each card or grid item links to the open solo” ersion of the associated content item on Connect.
For content deployed to Connect where no image has been supplied, a default image is used. Custom preview images must be set from the Connect dashboard or via the Posit Connect Server API. They are not created automatically.
In many cases, you will only see default images until your content is deployed.

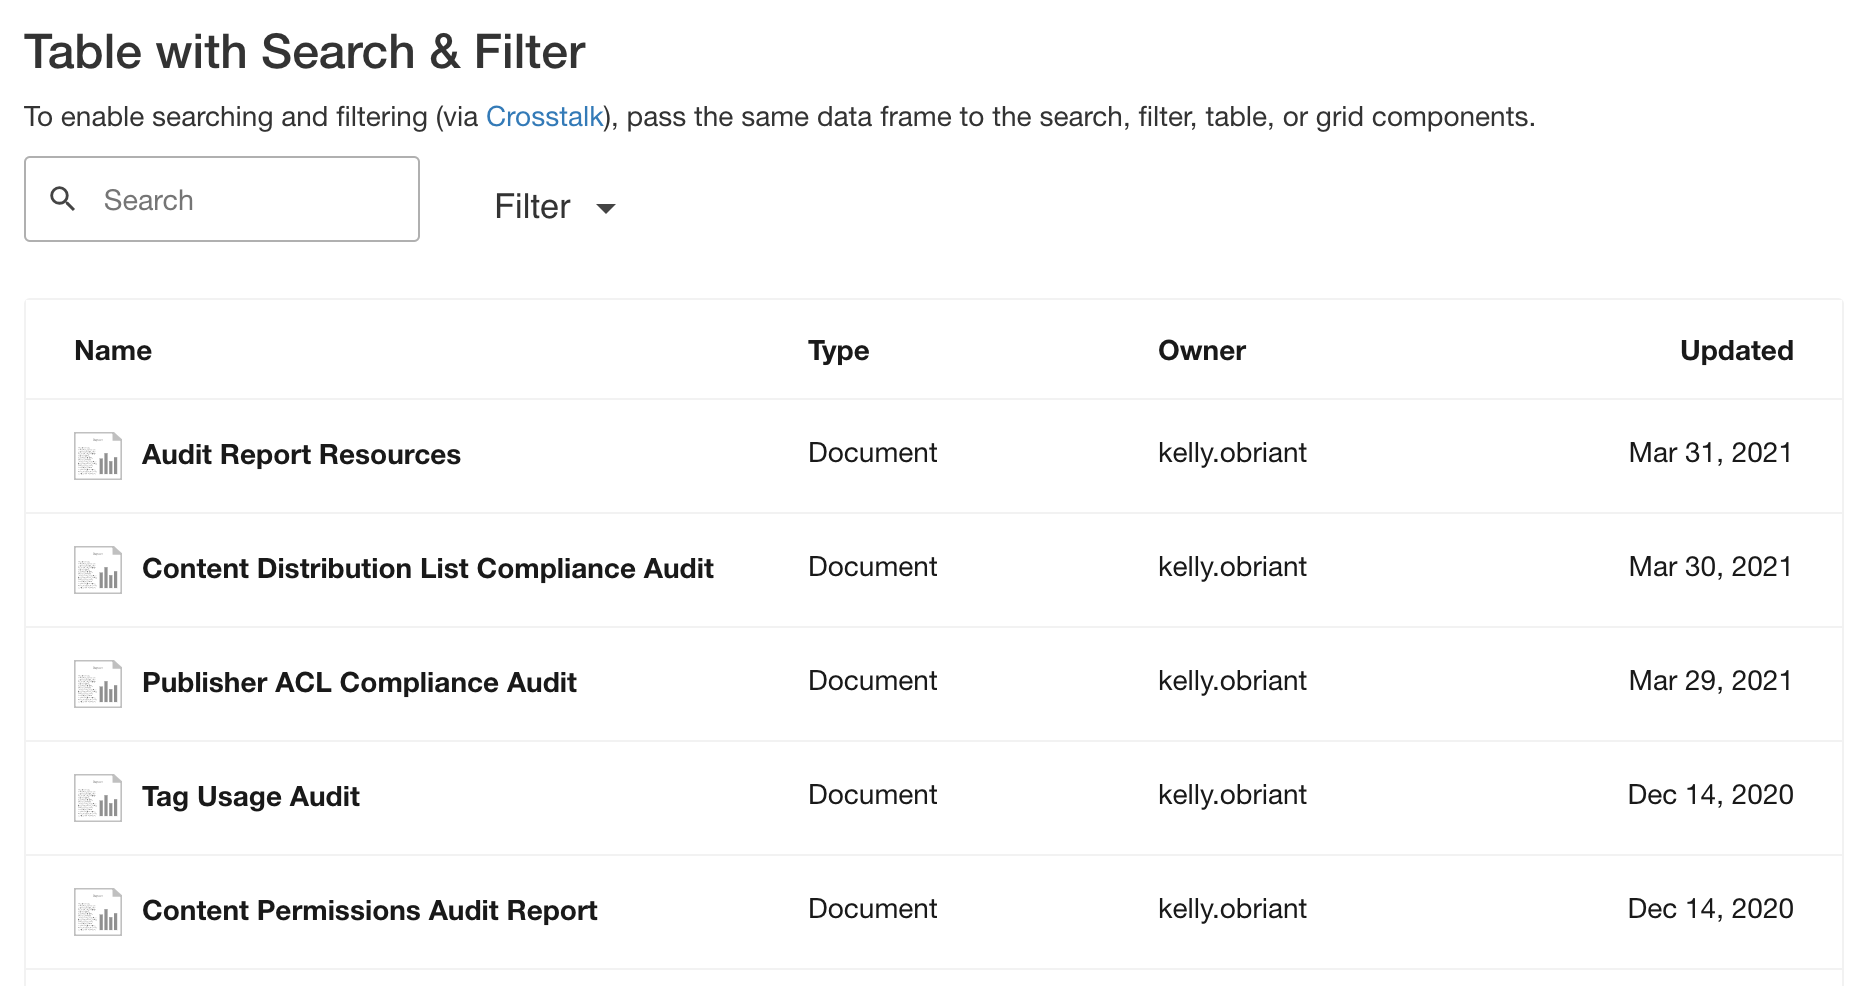
Table components display a fixed set of content metadata and provide links to the open solo version of the associated content item on Connect. Search and Filter components can be applied to the table view (as shown below) or the grid view.
Get started
Install the
connectwidgetspackage from CRAN:install.packages('connectwidgets')Retrieve an API key from your Posit Connect server:
Set up an
.Renvironfile:- Use an
.Renvironfile to setCONNECT_SERVERandCONNECT_API_KEYenvironment variables. If you’re not familiar with setting environment variables, review the R Startup chapter section of What They Forgot to Teach You About R. - Unless otherwise configured at the server level, Connect automatically applies values for these at document run time, so there is no need to include them in your code.
- Use an
Create an R Markdown document or Shiny application to display the
connectwidgetscomponents.Connect and pull your first content list:
NoteWe recommend starting with an R Markdown document, in which case, this code should be placed in an R code chunk.
library(connectwidgets)
library(dplyr)

client <- connect(
    # server  = Sys.getenv("CONNECT_SERVER"),
    # api_key = Sys.getenv("CONNECT_API_KEY")
)

all_content <- client %>%
    content()

glimpse(all_content)
If you are using a Publisher API key, the list of content returned will only contain items you own or have access to view or edit.
If you are using an an Administrator API key, the list of content items returned will contain all content on the server.
Visit the
connectwidgetspackage documentation site to learn more about the contents of the data frame.Filter
all_contentusingconnectwidgetshelper functions anddplyrto produce the curated set of content you’d like to display:by_tags()- Filters the data frame to only include content that has been tagged with the specified tag name(s). You can pass a single tag name or a vector of tag names.by_tagis provided as an alias for readability when using a single tag.by_owners()- Filters the data frame to only include content with the specified owner(s) by username. You can pass a single username or a vector of usernames.by_owneris provided as an alias for readability when using a single username.
# Example
audit_reports <- all_content %>%
    by_tag("Audit Reports") %>%
    arrange(created_time)
In this example,
all_contentis atibble()and can be manipulated withdplyr.Pass the curated set into a
connectwidgetscomponent:Card example:
all_content %>%
    slice(1) %>%
    rsc_card()
Grid example:
audit_reports %>%
    rsc_grid()
Table with Search & Filter example:
rsc_cols(rsc_search(all_content), rsc_filter(all_content), widths = c(2, 2))
rsc_table(all_content)
Visit the
connectwidgetspackage documentation site to view more examples.Customize the look and feel of the page:
connectwidgetscomponents support styling in rmarkdown::html_document via the bslib package. You can supply a Bootswatch theme in the yaml header, e.g.,:--- output: html_document: theme: bootswatch: minty ---or pass a custom theme consistent with your organization’s style:
---
output:
html_document:
    theme:
      bg: "#FFF"
      fg: "#22333B"
      primary: "#4F772D"
      dark: "#252525"
      light: "#DCE6D3"
      base_font: "Lato, sans-serif"
      heading_font: "Lato, sans-serif"
      border-color: "#E9F5DB"
      gray-100: "#F7FCF0"
---
Publishing and access controls
Publishing connectwidgets content should follow standard R Markdown and Shiny application deployment workflows.
Once the content item is published, adjust the Access Settings to the desired level. This action will not affect the access settings of any content items referenced within connectwidgets components on the page.
If a viewer does not have access to a content item displayed on your page, they will see an access request indicator instead of the preview image. Access requests are (by default) sent to the content owner and collaborators via email.
The example below shows what a connectwidgets grid view content item looks like to someone who doesn’t have access permissions to view it:

Note that the preview image for that content item has been replaced with the generic placeholder and an access request overlay. The access permissions dialog prompts the requesting user to select the level of access desired. In this example, the requesting user is a publisher, so they can choose either collaborator or viewer permissions. This triggers an email to be sent to the content owner and collaborators who can confirm or deny the request.