How to Publish a Jupyter Notebook to RStudio Connect#
This guide walks you through creating and publishing a new Jupyter Notebook and to RStudio Connect.
Prerequisites#
Before you begin, you must:
- Have the public URL of the RStudio Connect server
- Have a valid RStudio Connect account that has been promoted to at least the Publisher role
- Have a working Anaconda/Miniconda Python installation
- Have installed the following Python packages:
-
jupyter -
matplotlib -
pandas
For more information about requesting permission to publish your content, please see the Publishing section of the User Guide.
Step 1. Install the Jupyter Notebook extension#
First, you need to install the rsconnect-jupyter package for the Jupyter Notebook
that enables you to publish Jupyter Notebooks to RStudio Connect.
- Open a new terminal window and run:
Terminal
pip install rsconnect_jupyter -
Now, we need to enable the Jupyter Notebook extension:
Terminaljupyter-nbextension install --sys-prefix --py rsconnect_jupyter jupyter-nbextension enable --sys-prefix --py rsconnect_jupyter jupyter-serverextension enable --sys-prefix --py rsconnect_jupyter -
To verify that the installation was successful, run:
Terminaljupyter notebook- If the Jupyter Notebook interface doesn't automatically display in your browser, then copy and paste the URL(s) provided in the output of your terminal.
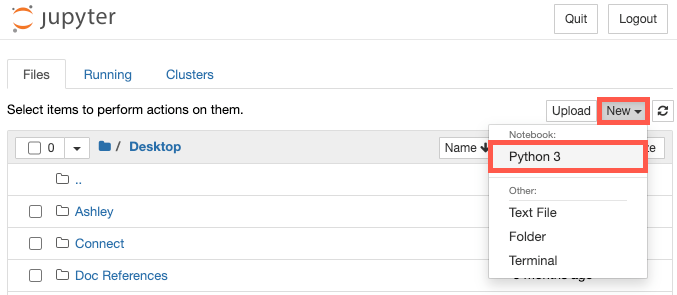
Step 2. Create a new Jupyter Notebook#
We are going to create a sample notebook that we will publish to RStudio Connect.
- Open your browser window displaying the main Jupyter Notebook interface, if applicable.
- At the top of the page, click New and select Python 3.
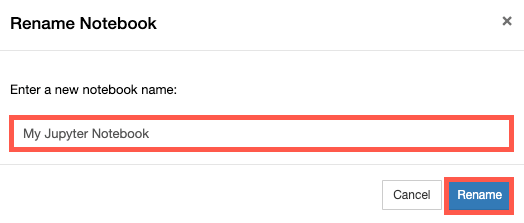
- Click the title field.
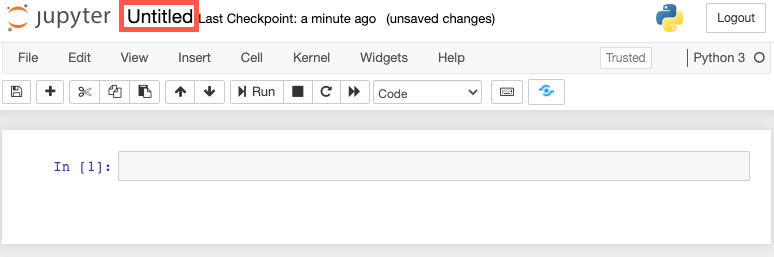
-
In the Rename Notebook window, give your notebook a name and click Rename.
-
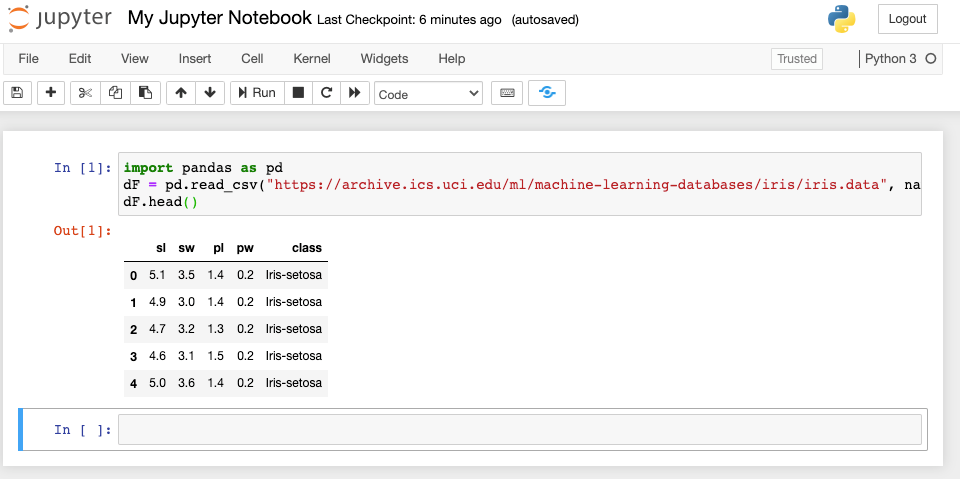
In the cell, copy and paste the following:
import pandas as pd dF = pd.read_csv("https://archive.ics.uci.edu/ml/machine-learning-databases/iris/iris.data", names=["sl", "sw", "pl", "pw", "class"]) dF.head() -
Press Shift + Enter.
The first five rows of the dataset display.
-
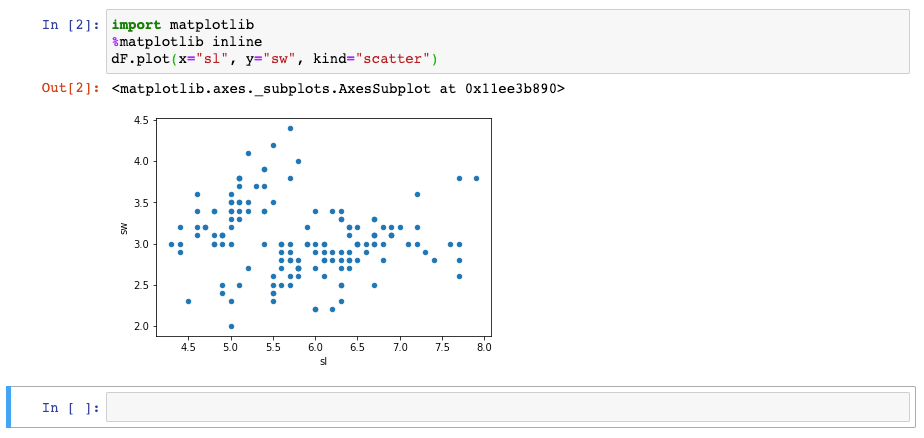
In the new cell, type:
import matplotlib %matplotlib inline dF.plot(x="sl", y="sw", kind="scatter") -
Press Shift + Enter.
A scatter plot displays.
Step 3. Connect Jupyter Notebook to RStudio Connect#
Note
This is a one-time configuration step that is required to publish Jupyter Notebooks to RStudio Connect.
To publish our notebook to RStudio Connect, we need to generate an API Key.
- Navigate and log into RStudio Connect.
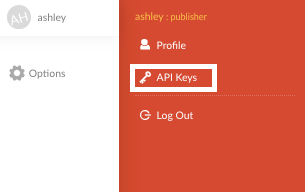
- Click your username or profile icon.
- Click API Keys.
- Click + New API Key.
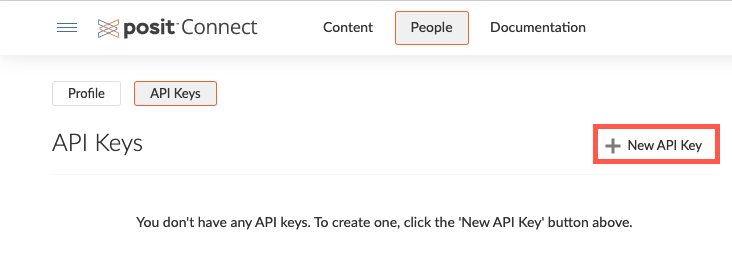
- Enter a name for your API Key and click OK.
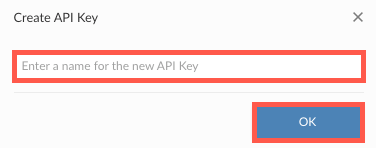
- To copy your API Key, click Copy.

Step 4. Publish to RStudio Connect#
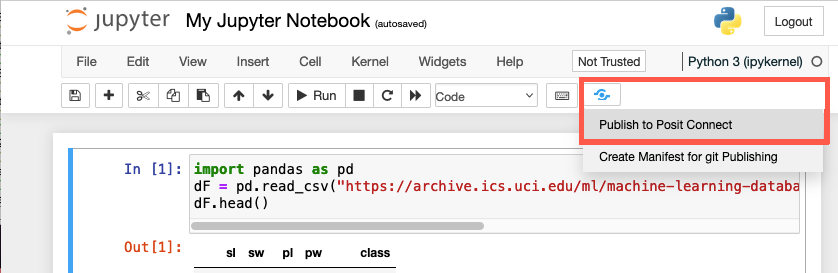
- Return to your Jupyter Notebook that you wish to publish.
- Click Publish and select Publish to RStudio Connect.
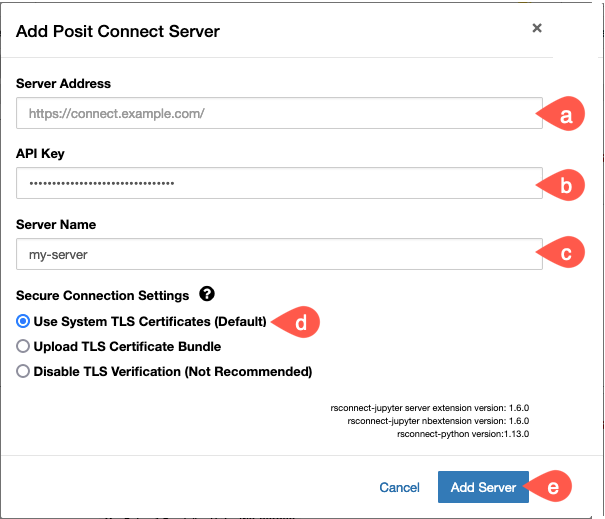
- Add your RStudio Connect Server:
- In the Server Address field, enter the public URL used to access RStudio Connect.
- In the API Key field, paste the API Key that you generated in RStudio Connect.
- In the Server Name field, type a name for your server.
- If you require an option other than the default Use System TLS Certificates option, then select one of the Secure Connection Settings.
- Click Add Server.
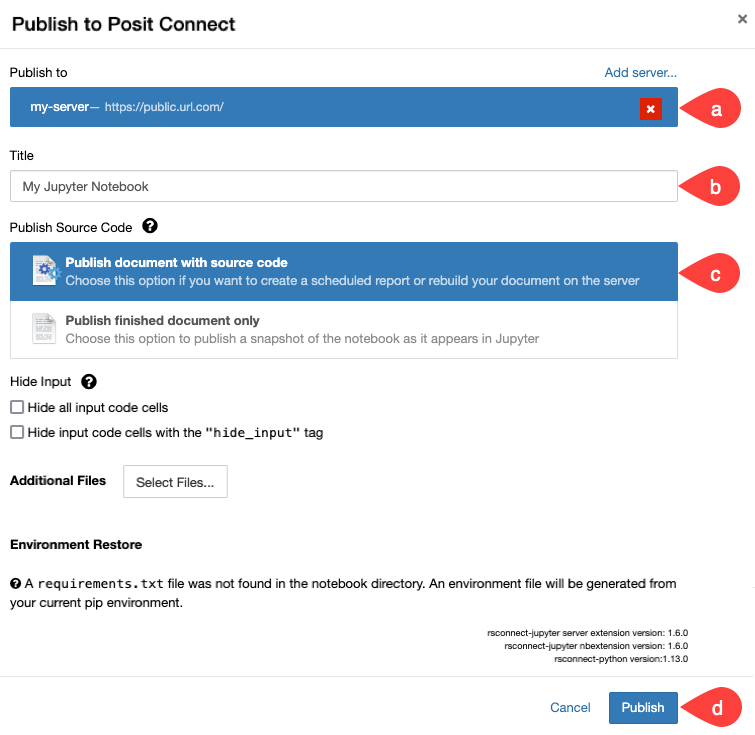
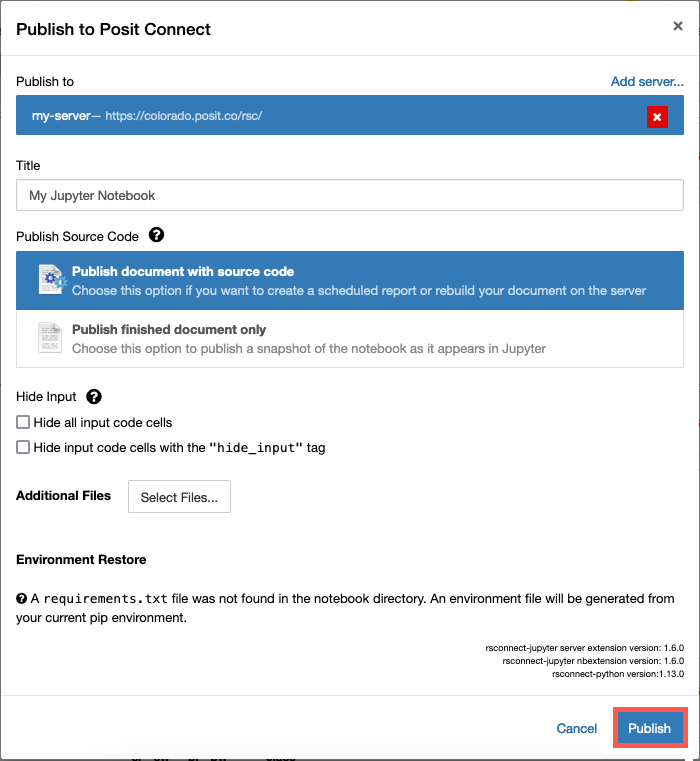
- In the Publish to RStudio Connect window, do the following:
- In the Publish to field, confirm that your RStudio Connect Server Address (the public URL) is correct.
- Optionally, update the title of your Jupyter Notebook that will be displayed in RStudio Connect.
- Leave the default option for Publish Source Code selected.
- Click Publish.
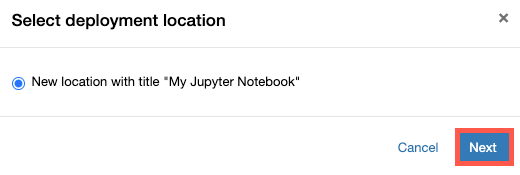
- Select the radio button for your notebook and click Next.
-
Click Publish.
-
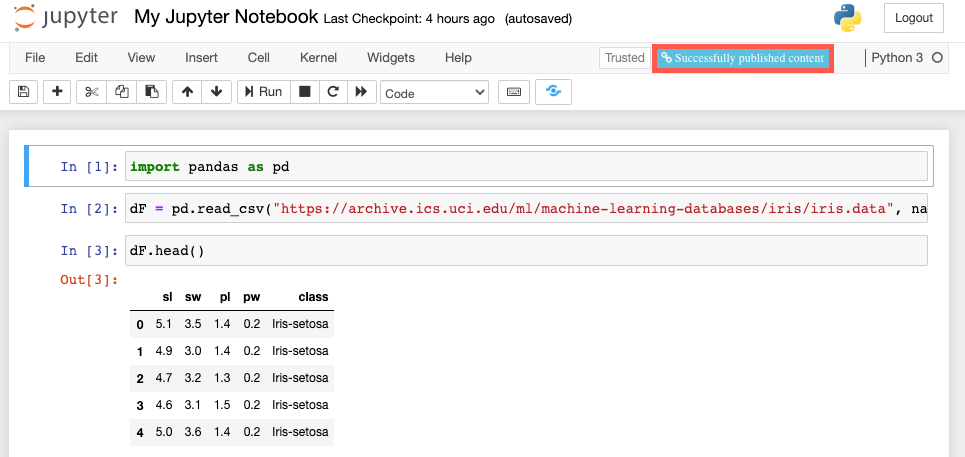
At the top of the interface, click the Successfully published content button.
An RStudio Connect browser window opens and displays your published Jupyter Notebook.
Info
Your Jupyter Notebook is running Python code because we have reconstructed the Python environment in RStudio Connect.
Here is an example of a Jupyter Notebook that was published to RStudio Connect:

Related Documentation#
- RStudio Connect Jupyter Notebook Extension
- Jupyter Notebook - RStudio Connect User Guide
- Publishing Jupyter Notebooks - RStudio Connect User Guide
Bonus Content
We also have a Video Tutorial available.