How to Publish a Shiny App to RStudio Connect#
This guide used RStudio IDE Version 1.3.959
This guide walks you through creating a new Shiny App and then publishing your app to RStudio Connect.
Prerequisites#
Before you begin, you must:
- Install R
- Install the RStudio Integrated Development Environment (IDE)
- Have the public URL of the RStudio Connect server
- Have a valid RStudio Connect account that has been promoted to at least the Publisher role
- Connect your RStudio Account
For more information about requesting permission to publish your content, please see the Publishing section of the User Guide.
Note
As you walk through this guide, there may be additional steps that are required due to your unique environment. For example, you may need to install or update packages, restart R, etc. In many cases, RStudio prompts you to complete the action that is required to continue with this guide. If you get stuck, please refer to the Related Documentation section or the RStudio Connect Admin Guide.
Step 1. Create a new Shiny Web App#
RStudio IDE has a sample Shiny Web App that is available out of the box. For this guide, we are going to utilize the sample Shiny Web App because everyone has access to it, and it allows us to focus on the task of publishing a Shiny App to RStudio Connect instead of building an app from scratch. Let's begin!
- Open the RStudio IDE.
-
From the menu bar, select File > New File > Shiny Web App....
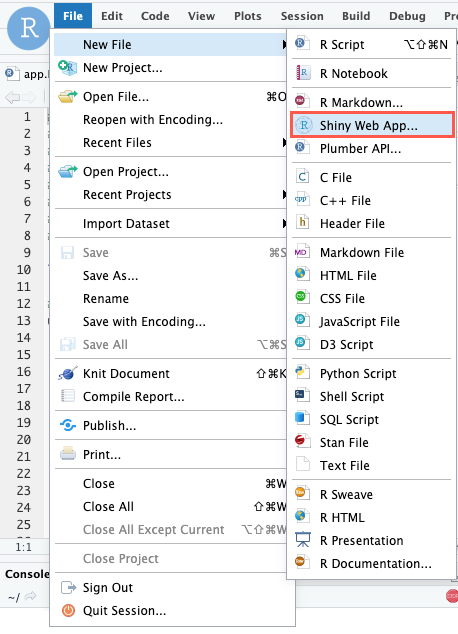
The New Shiny Web Application window displays.
-
Give your application a name and click Create.
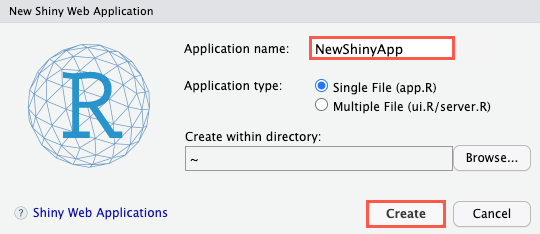 The script for your Shiny web application displays in the editor.
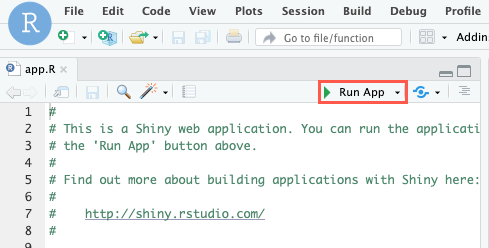
Now, we should confirm that the application was successfully created.
- To verify that it was created successfully, at the top of the editor, click
Run App.
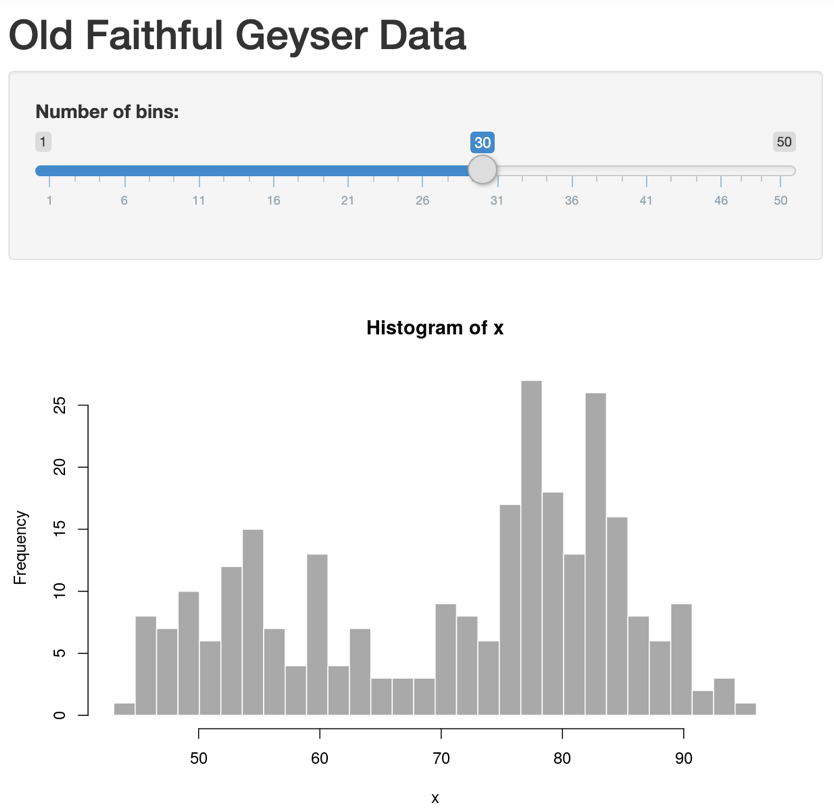
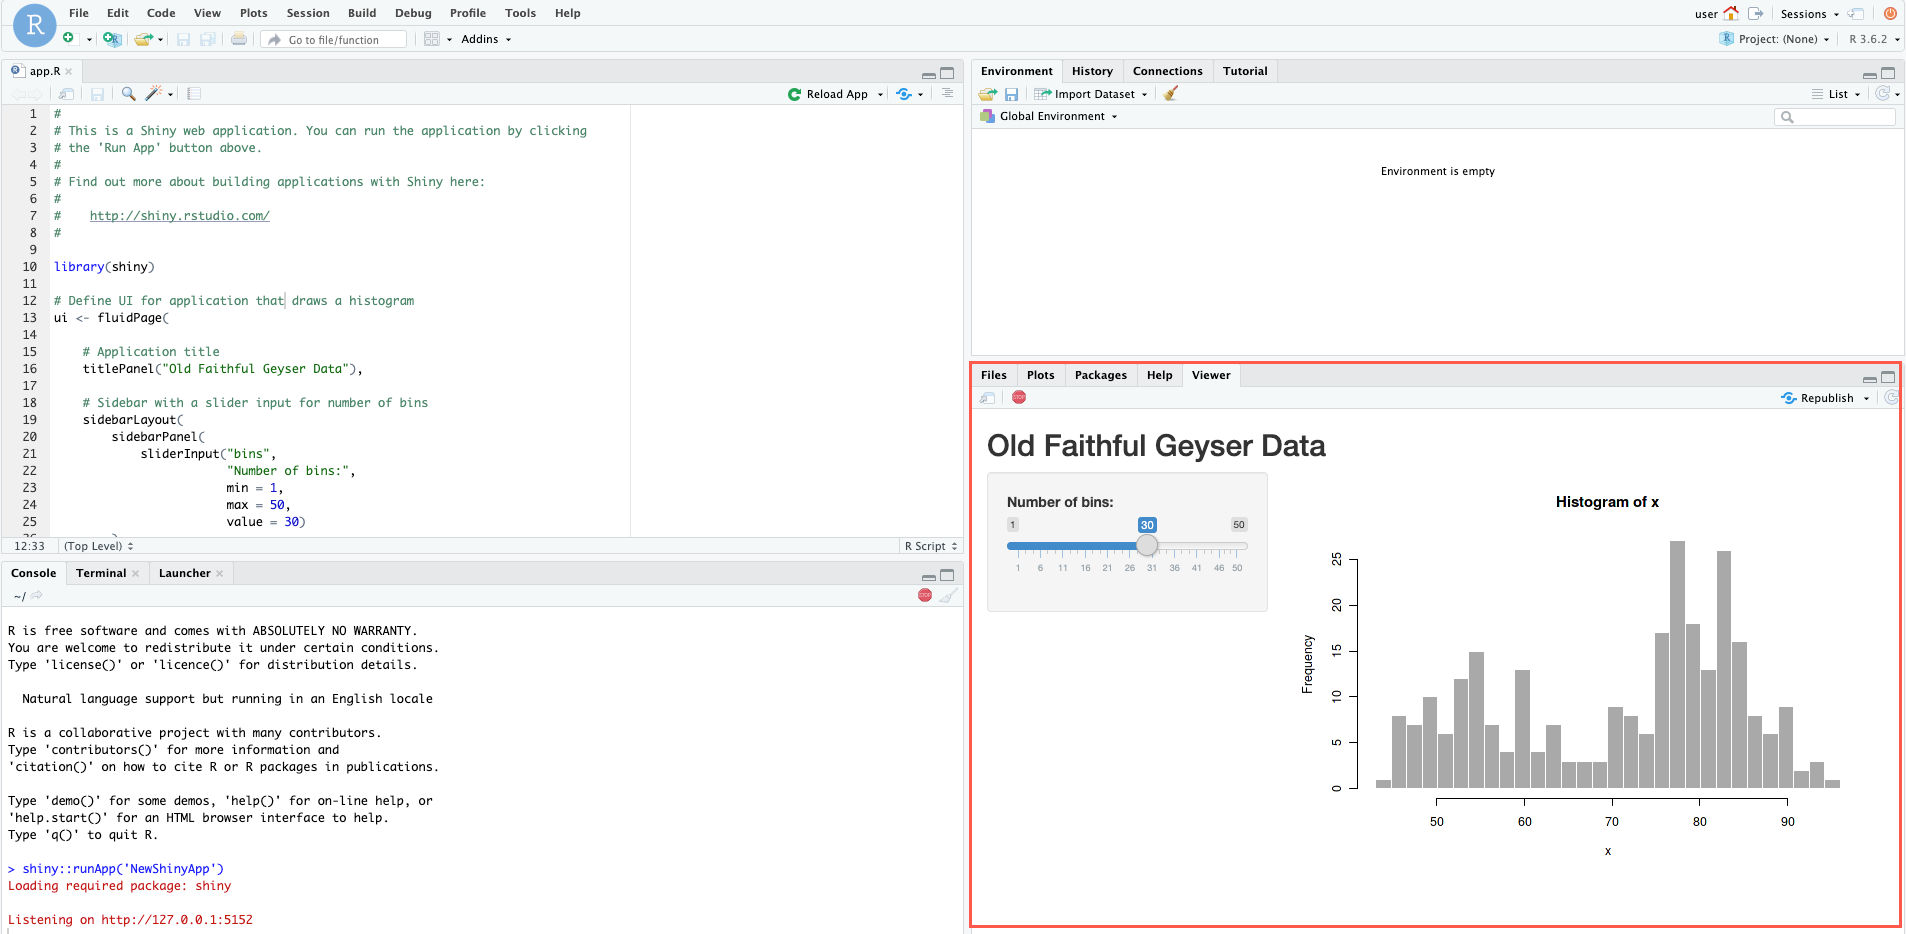
If the creation of the new Shiny App was successful, a new window displays the
RStudio sample Shiny Web App named Old Faithful Geyser Data.
Step 2. Publish your Shiny App to RStudio Connect#
Note
Before you execute this step, verify that you have connected your RStudio Account. The procedures are available here.
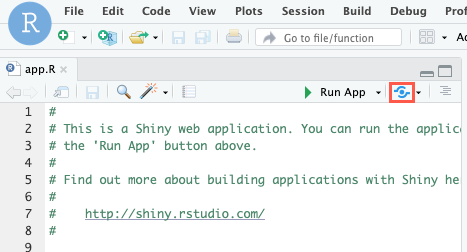
- At the top of the editor, click Publish.
-
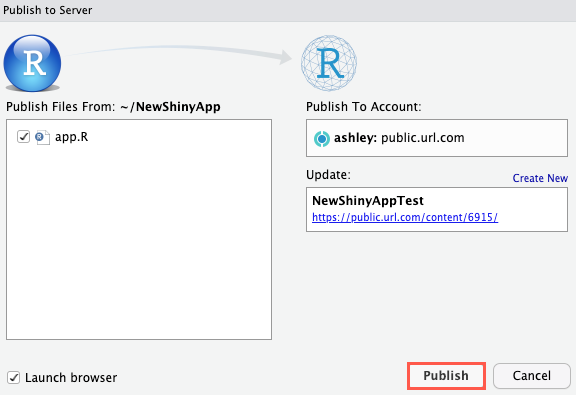
In the Publish to Server window, confirm that your account is shown in the Publish To Account section and click Publish.
User Tips
- You can monitor the status of the deployment in the RStudio IDE Deploy pane.
- If for any reason you would like to stop the deployment, you can simply click the Stop button located in the Deploy pane.
- Your newly deployed R Markdown document automatically opens in a new browser tab if the Launch browser check box is selected (it is selected by default).
- If it doesn't automatically display, your app may have been blocked as a popup in your browser.
Step 3. View the Shiny App on RStudio Connect#
- Navigate back to the RStudio Connect server that you published your content to.
- If applicable, log back into RStudio Connect.
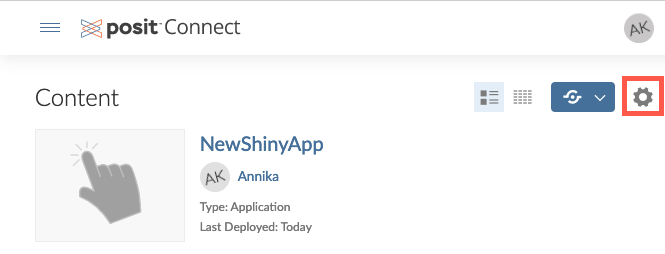
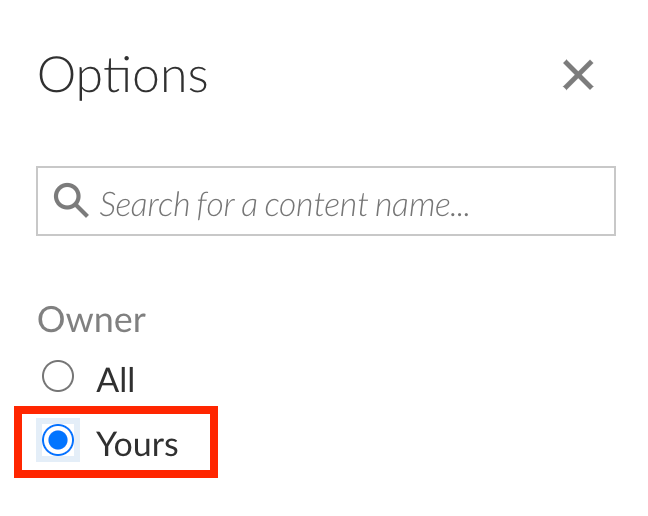
- To view the Content that you own, click the Show Options panel button.
-
In the Owners section, select Yours.
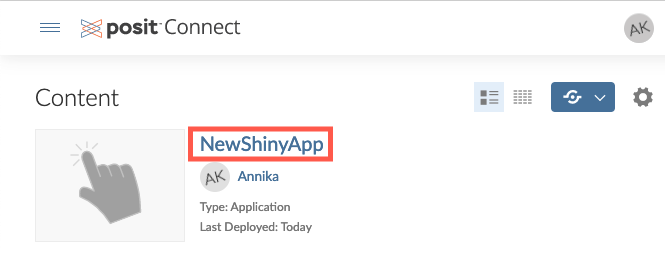
 Your Shiny App should display in the Content section.
 -
To view your Shiny App, simply click the title of your app.
Your Shiny App displays in the RStudio Connect browser window.