Integrate Workbench with Jupyter Notebook, Launcher, and Kubernetes
These steps describe how to set up Workbench installed outside a Kubernetes cluster to launch Jupyter Notebook and JupyterLab sessions into a Kubernetes cluster.
The architecture described on this page is not our recommended way of integrating Workbench and Kubernetes. We recommend using our Workbench helm charts to run both Workbench and the associated Jupyter Notebook and JupyterLab sessions entirely in a Kubernetes cluster.
Prerequisites
This integration is intended to be performed on top of an installation of Workbench that has already been configured with Launcher and Kubernetes:
Step 1. Configure Launcher with Jupyter Notebook
Add the following lines to the Launcher Jupyter configuration file:
/etc/rstudio/jupyter.conf
jupyter-exe=/opt/python/3.9.14/bin/jupyter
notebooks-enabled=1
labs-enabled=1
default-session-cluster=Kubernetes
default-session-container-image=rstudio/r-session-complete:jammy-2024.04.1
The jupyter-exe path must be available to the Workbench host, but also be mounted or otherwise accessible to the container running the Jupyter Notebook or JupyterLab session. The WORKBENCH_JUPYTER_PATH environment variable can also be set in your container build to specify the path to the Jupyter executable. See Jupyter Configuration for more information.
The specification of default-session-container-image is optional as it allows for a particular image to be used by Jupyter sessions, otherwise the default-container-image setting in /etc/rstudio/launcher.kubernetes.profiles.conf will be used.
Step 2. Restart Workbench and Launcher Services
Restart the services:
Terminal
$ sudo rstudio-server restart
$ sudo rstudio-launcher restart
Step 3. Test Workbench with Launcher and Jupyter Notebook
From your browser, navigate to the Workbench interface and log in.
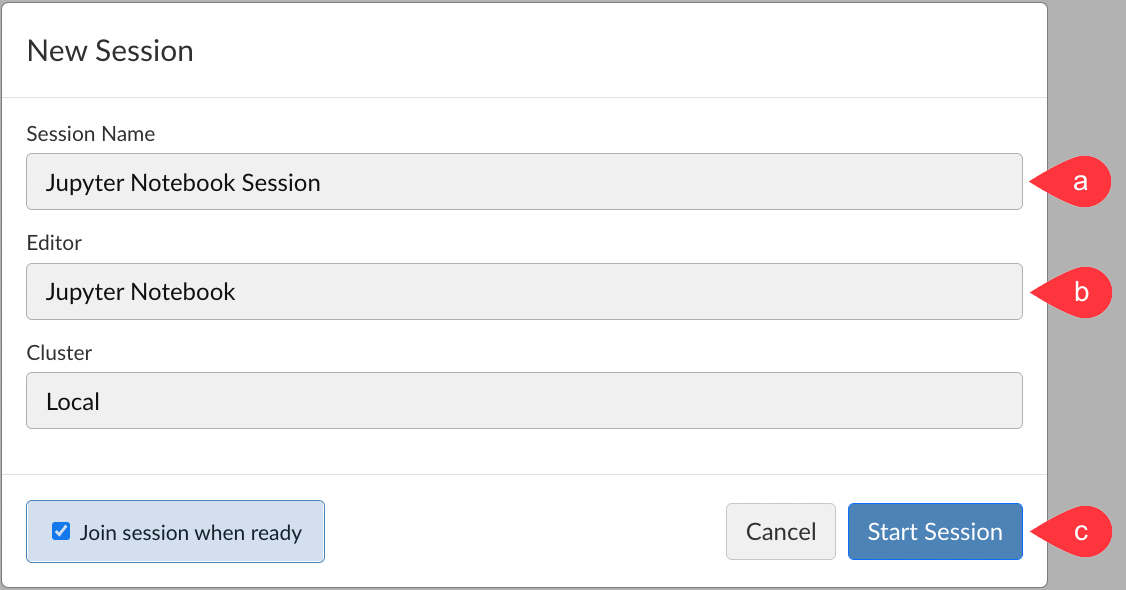
Select New Session and do the following:
-
Give your session a name.
-
In the Editor field, select either Jupyter Notebooks or JupyterLab as the IDE.
-
Click Start Session.
-
Now, you can use the Jupyter Notebook or JupyterLab interfaces.
Some local Jupyter configurations may prevent the JupyterLab session from correctly launching in Workbench. For example, setting a password in the files ~/.jupyter/jupyter-server-config.json or ~/jupyter/jupyter-server-config.py, will cause the JupyterLab session to start but not load through the Workbench interface. Commenting out the configuration in question is sufficient to restore expected functionality.
(Optional) Configure multiple Python versions or environments
The Python integration steps described above result in a single Python environment that contains both core packages for Jupyter Notebook, as well as Python packages for end users.
While this is a simple approach, this setup can result in issues if end users want to use different versions of the same package or if some packages conflict with core packages for Jupyter Notebook.
If you would like to use multiple versions of Python or different Python environments, or if you want to install Jupyter Notebook in a separate environment from Python packages for end users, then you can refer to the documentation for using multiple Python versions and environments with Jupyter.
Additional Documentation
For more information on Workbench and Launcher, refer to the following reference documentation: